Wednesday, August 1, 2012

VINAYAGA CHATHURTHI - KOZHAKATTAI


Vinayaga (Pullaiyar) Chathurthi is celebrated on the ‘chathurthi’ day of  Aug-Sep all over India. The ‘Palakkad’ Iyers prepare ‘kozhakattai’ ('modakam) – three varieties – ‘vella kozhakattai’, ‘ulundu kozhakattai’ and ‘ammini kozhakattai’. The last mentioned is a simple variety which makes use of the left-over rice flour dough and is simply delicious too.
I still remember, we used to gorge on the different varieties of ‘kozhakkattai’s - sweet and savoury - alternately and would have bellies resembling ‘Ganesha’s’ at the end of the day!


'Kozhakattai' (modakam) is supposed to be the favorite of Lord Ganesha and is prepared as offering to him in South Indian households on Ganesh Chathurthi. It is also prepared whenever Ganapati homam is conducted. The recipes for Vella Kozhakattai and Ulundu Kozhakattai are given separately. But the same rice flour is an ingredient for both - so powder desired quantity of rice and use for both recipes. Use the leftover dough to prepare 'ammini  kozhakattai.

VELLA KOZHAKATTAI
Makes 25-30 kozhakattais.

Ingredients –
For outer covering -
Freshly powdered rice flour – 2 cups
Water – 21/2 - 2 3/4 cups
Filling -
Coconut – 1 – finely grated – 2 ½ -3 cups
Jaggery – 2 cups
Ghee – 1 tsp
Cardamom powder – ½ tsp

Method –
To make fresh rice flour -
Wash 2 1/2   cups of raw rice and soak it in water for an hour.
Drain in a colander and spread on a paper and leave it for 10-15 minutes.
Powder in a mixer and sieve well. Spread it and leave it for at least a couple of hours. This will give 5 cups of rice flour.
Use 2 cups for 'vella kozhakattai' and 2 cups for 'ulundu kozhakattai' and 1 cup for 'ammini kozhakattai'.


Vella Kozhakattai -


Outer covering -
In a big kadhai, heat 2 glasses of water.
Add 2 tsp of oil and a pinch of salt and stir well.
Add 1/2 - 3/4 cup of water to the rice flour and mix well.
When the water starts boiling, lower the heat.
Add the rice flour batter to the boiling water and keep stirring well till the water is absorbed and rice flour gets cooked. There should be no lumps. 
Turn off the flame and keep covered for 5-10 minutes.
When it cools, knead it into soft dough with oiled palm and set aside.

Filling –
Heat ½ cup of water in a kadhai.
Add 2 cups of jaggery and keep stirring on a low flame till it dissolves completely.
After it cools a bit, strain it to get rid of tiny particles of dirt if any.
Heat it again and add the grated coconut and keep on high flame till excess water gets evaporated. Add a tsp of ghee and stir well.
Turn off the heat.
After 10 minutes add ½ tsp of cardamom powder and mix well.

To make kozhakattai –
Take 2 tsps of oil in a small bowl to dip your fingers into. Oil your palms and fingers.
Take a small lemon-size ball of dough and roll it into a ball.
With your oiled fingers, flatten the edges first and then the centre part till it has the shape of a little bowl.
Put a teaspoonful of the coconut filling into the dough-bowl and bring together the edges and keep a little elongated upper portion – to look like a coconut.
Repeat with the rest of the dough and filling.
Oil a flat colander and place the kozhakattais gently on it without touching one another and steam for 5-7 minutes.
Open after 5 minutes. The kozhakatais should have a glazed look. They should also not stick to your fingers. If they are sticky, steam for a couple of minutes more.
Gently remove one by one when they have cooled a bit.


Tips –
The rice flour can be stored (after drying it for 20-24 hours in the shade) in an airtight bottle in the fridge for later use (for up to 10 days).
The dough and filling can be prepared a day in advance and kept in the fridge to reduce the elaborate work on a single day.

ULUNDU KOZHAKATTAI


Makes 20 ulundu kozhakattai

Ingredients –

For covering
Fresh rice flour – 2 cups
Water - a little more than 2 cups
Salt to taste
For filling
Urad dal – 1 cup
Tuvar dal – 2 tbsp
Whole red chilli – 1-2
Grated coconut – 4-5 tbsp
Oil – 3-4 tsp
Mustard seeds – 1 tsp
Urad dal – 1 tsp
Whole red chilli – 3 pieces
Asafetida – ¼ tsp
Curry leaves – 10
Salt to taste

Method
To prepare the outer covering -
In a big kadhai, heat 2 glasses of water.
Add 2 tsp of oil and salt to taste and stir well.
Add ½ - 2 3/4 cup of water to the rice flour and mix well.
When the water starts boiling, lower the heat.
Add the rice flour batter to the boiling water and keep stirring well till the water is absorbed and rice flour gets cooked. There should be no lumps.
When it cools, knead it into soft dough with oiled palm and set aside.

Filling –
Wash urad dal and tuvar dal and soak in water for 40 minutes.
Drain off the water and grind coarsely along with whole red chillies in a mixer.
Add salt to taste and mix well.
Steam like idlis for 10-15 minutes.
When cooled, crumble it well.
Heat 2-3 tsps oil and add mustard seeds, urad dal, red chilli pieces and asafetida.
Add curry leaves and add the crumbled dal and mix well.
Add grated coconut and mix well.
When cooled, make oval shaped balls for the filling.

To make kozhakattai –
Take 2 tsps of oil in a small bowl to dip your fingers into. Oil your palms and fingers.
Take a big lemon-sized ball of dough and roll it into an oval ball between your palms.
With your oiled fingers, flatten the edges first and then the centrerpart till it has the shape of an oval bowl.
Put one dal ball into the dough-bowl and bring together the edges and keep a little elongated upper portion all along – like the shape of a semi-circular karanji.
Repeat with the rest of the dough and filling.
Oil a flat colander and place the kozhakattais gently on it without touching one another and steam for 5-7 minutes.
Open after 5 minutes. The kozhakatais should have a glazed look. They should also not stick to your fingers. If they are sticky, steam for a couple of minutes more.
Gently remove one by one when they have cooled a bit.

AMMINI KOZHAKATTAI


Ingredients
Kozhakattai dough - 1cup
Red chilli powder - 1/2 tsp (optional)
Salt to taste
Mustard seeds - 1/2 tsp
Urad dal - 1/2 tsp
Asafetida - a pinch
Whole red chilli pieces - 2
Curry leaves - 5
Coconut pieces - 1 tbsp
Oil - 2-3 tsps
Method
Use the remaining rice flour dough (of the covering) to make this.
Add required salt and red chilli powder and mix well into the dough with your hand.
Make marble sized balls.
Place them in an oiled flat colander without touching one another and steam for 5-7 minutes.
Remove them after 5 minutes.
Heat 2-3 tsp oil in a kadhai and add mustard seeds, urad dal, red chilli pieces and a pinch of asafetida, followed by curry leaves.
When they splutter, add the small kozhakattais and coconut pieces and gently stir. It's ready to eat!

Tips - Some add whole red chilli pieces to the 'tadka' instead of mixing red chilli powder to the dough - so the 'ammini' is white instead of  orange.
It is better to prepare the rice flour covering the previous day and store in the fridge as kozhakattais will be easier to make. It will also not overburden you on the day of the festival.

© Copyright 2011. Brinda Balasubramonian.


DIWALI DELICACIES - MYSORE PAK


Diwali is the ‘King of Festivals’ in India. Interestingly among the Palakkad Iyers, it is purely a time for jubilation – there is no ‘neivedhyam’ on this occasion!

Of course the ladies of the household get busy a week in advance – planning and making preparations for the snacks to be prepared for Diwali. You’d be surprised (no?!) to hear that everything would be prepared at home – from scratch. There would be a sort of competition among relatives and friends as they’d vie with one another sharing the special items prepared. Why, to this day, I'm proud to proclaim that I make all my Diwali snacks at home – three sweets and three savories – yes!

On Diwali morning the members of the household wake up early, light the lamp, burst a few crackers, have oil bath and don new clothes. Then they enjoy the Diwali snacks. Then the lady would get busy making separate packets for distribution among family and friends as the rest of the family would gape at the alarming rate at which the items would disappear! This also gives the lady a chance to show off her new saree (Kanjeevaram or otherwise)!

‘Ukkaarai’ used to be a must on this day but it is on the wane now.
Breakfast is usually ‘idlis’ – with chutney, molagappodi or sambar as per the convenience!

MYSORE PAK
A very popular South Indian sweet, Mysore Pak is a must at weddings and for Diwali and any special occasion. Those made by hoteliers and caterers drip in ghee and are delicious of course. But what my mom used to make was yummy as well, soft and melting-in-the-mouth. So here is our home-made yummy Mysore Pak with less ghee - for the calorie-conscious and others!


Ingredients -
Besan - 1 cup
Sugar - 2 1/4 cup
Pure ghee - 1 cup (melted)
Water - about 1/2 cup


Method -
Spread out the cup of besan and make sure it doesn't have any lumps.
Heat the ghee on a low flame till it is hot and set aside.
Take water in a thick-bottomed kadhai and add sugar and heat it.
Keep stirring till the sugar dissolves and boil for 1-2 minutes.
Add the besan and keep stirring well.
Lower the flame.
Add the hot ghee - a little each time and keep stirring till almost the entire ghee is used up.
Continue to stir till bubbles start appearing and add the remaining ghee. Keep stirring till the mixture leaves the sides.
Pour on to a greased plate.
After 3-4 minutes, make cuts in diamond shapes (right through the entire thickness) with a knife greased with ghee.
Cut along the same lines and remove the pieces only after 10 minutes.

Tips -
Use hot ghee for better results.
Make sure there is no disturbance especially when you are in the final stages. Better to try it when your hubby is away or baby is asleep or when you don't expect the door bell.
The critical point is tricky - mom used to make soft Mysore Pak which is my style. This will have the glaze - the finish point is when bubbles just start forming and the mixture leaves the sides.
If you want porous and slightly harder version, stir for a couple of minutes more till more bubbles are formed and the glaze disappears.
Don't worry, you'll arrive at the optimum point after a couple of trials but in all cases, the sweet will be delicious.
Draw the lines through and through only 3-4 minutes after pouring out the mixture. If it sticks to the knife, wait for a couple of minutes more.
Don't forget to remove them carefully - separating the pieces before they are completely cooled.


© Copyright 2011. Brinda Balasubramonian.

Tuesday, July 31, 2012

NAVARATRI - CHUNDAL VARIETIES


The ‘nine-day ‘Navaratri’ festival is celebrated in October all over India. It is also known as 'Dussera' / 'Durga Puja' in North India - celebrating the killing of 'Mahishaasura', the demon by Goddess Durga. The 9th day is celebrated as 'Mahanavami' / 'Aayudha Puja' or 'Saraswati Puja' when books and musical instruments placed in front of Goddess Saraswati and puja is performed. As kids we'd love this day as we had to keep away from books! Next day, on 'Vijaya Dashami', toddlers are inducted to learning by the senior-most family member - by making them write 'Hari Sri Ganapathaye Namaha' on a tray of rice. Of course, after puja, every member begins with this writing and then takes out the books and starts reading. And singing too. 'Saraswati Puja' and 'Vijaya Dashami' are special days - with mini feasts at home - with vada & payasam.


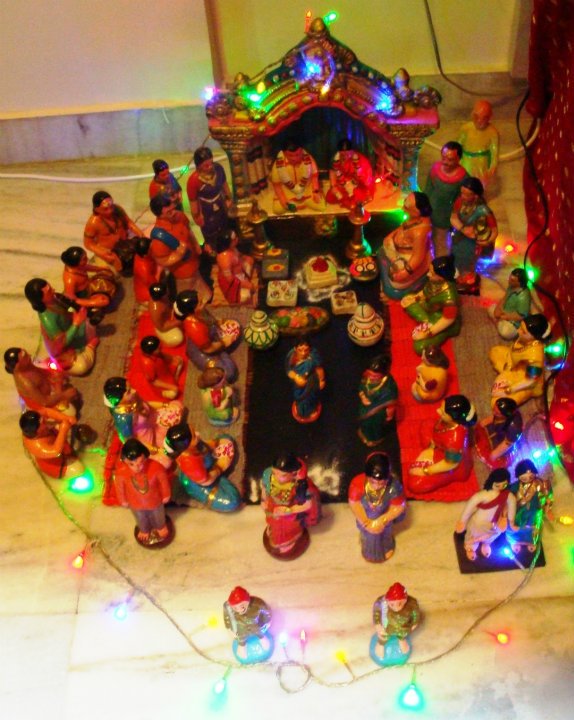
'Navaratri' is enthusiastically celebrated by the Tam Brahm ladies and girls with ‘golu’ – decoration of dolls on an odd number of steps (5, 7 or even 9) in a room, with parks, hills, and village scenes artistically arranged on the sides.Every day, puja and ‘neivedhyam’ are offered. Ladies and girls (read children) are invited for ‘manjal-kungumam’ (‘haldi-kumkum’). Music-lovers grab this opportunity to sing at the 'golu'. The fair sex are honoured with ‘vethala-paakku’ (betel leaves & betel nuts), pazham (banana) and some variety of ‘chundal’ (or 'neivedhyam' (offering) of the day). Married ladies are given a coconut and blouse piece (or some fancy item) in addition.


KADALA CHUNDAL


Ingredients
Kadalai (kala chana/ black chick peas) – 1 glass (soaked overnight in water)
Turmeric powder – ¼ tsp
Grated coconut – 3-4 tbsp
Green chilli – 2
Mustard seeds – 1 tsp
Urad dal – 1 tsp
Whole red chilli – 2
Asafetida – ¼ tsp
Curry leaves – 8
Coriander leaves – chopped fine (2 tbsp)
Oil – 4 tsp
Salt to taste
Juice of 1 lemon (optional)

Method
Wash and soak the chana for 10 hours (or overnight)
Pressure cook it with turmeric powder and ½ tsp of oil for 5-6 whistles.
On cooling, drain off the water and add required salt and mix well.
Heat 3-4 tsp of oil in a pan.
Add mustard seeds, urad dal, red chilli pieces and asafetida, followed by curry leaves.
Then add the chana and mix well.
Add grated coconut and mix well.
Add lemon juice and coriander leaves and mix well.

Tips
This can be prepared as a healthy tea-time snack.
While pressure-cooking the chana, you may lower the flame after two whistles and cook for 25 minutes and turn off the gas.


KABULI CHANA CHUNDAL


A similar chundal can be prepared with 'kabuli chana' (chick peas) with the same recipe.


MATAR CHUNDAL

The same recipe holds good for this chundal using dry white peas or dry green peas - soaking them overnight and pressure-cooking them for 3-4 whistles.


KAPPALANDI (VERKADALAI - PEANUTS) CHUNDAL


This chundal is made using peanuts. I use peanut with shells which are available at this time of the year. They have to be washed thoroughly to get rid of the mud. They have to be pressure-cooked (with the shells) with water and required salt for 3 whistles. Shell them on cooling and make chundal as mentioned in the earlier recipes - use 500 gms of peanut shells.

If it is too cumbersome, you can use 1 cup of regular peanuts - soak them in water for 3-4 hours and pressure-cook them for 3-4 whistles and prepare the chundal.


KADALAPARUPPU CHUNDAL

                     
This chundal is made with boiled chana dal (pressure-cooked for 3-4 whistles) instead of black chana.


PAYARU CHUNDAL (SWEET)


Ingredients
Vella payaru (lobhia) – 1 glass
Jaggery – 1 glass
Grated coconut – 3-4 tbsp
Turmeric powder – ¼ tsp
Salt – a pinch
Oil – ½ tsp
Ghee – 1 tsp
Cardamom powder – 1 tsp

Method
Wash and soak the vella payaru in water for a couple of hours.
Pressure-cook it with turmeric powder and ½ tsp of oil and a pinch of salt for 3-4 whistles.
Drain off the water and use it for making jaggery syrup.
Dissolve jaggery in minimum water and boil.
Add the boiled ‘payaru’ and stir well.
Continue to heat till excess water has evaporated.
Add grated coconut and cardamom powder and a tsp of ghee and mix well.
Serve hot or cold.
Tips
The same recipe can be used for ‘pachha payaru’ (green moong) – first lightly roast the whole green moong before soaking in water and pressure-cooking.


VELLAPAYARU CHUNDAL (salty) can be prepared just like the rest of the chundals after pressure-cooking it with turmeric and salt.

Vada can be prepared as 'neivedhyam' on one of the days.

© Copyright 2011. Brinda Balasubramonian.


Saturday, June 9, 2012

JANMASHTAMI - THENGOZHAL, CHEEDAI, NEYYAPPAM, VELLA AVAL


‘Janmashtami’ / ‘Gokulashtami’ celebrates the birth of Lord Krishna. Any festival is an excuse for exotic delicacies in the Indian household. The Palakkad people prepare ‘murukku’, ‘cheedai’ and ‘vella cheedai’ on this occasion and offer ‘neivedhyam’ in the late evening – closer to night – though strictly speaking it has to be done at midnight when Krishna is supposed to be born! I remember my sons issuing me strict orders that my puja should be over by 5.30 pm – when they’d land up after school – the aroma pervading the home would be too tempting to the starved boys to wait any longer. So ‘Krishna’ would ‘arrive’ at our house much earlier!

I have to admit that I have modified my offerings – my mom would make wonderful ‘murukku’ – twisting the rice dough between her fingers to make the cute creation. It was my sister or me who’d fry them carefully in oil till golden brown. In spite of my mom repeatedly insisting that we try out making ‘murukku’, we never resorted to it – and so we make ‘thengozhal’ instead – the ingredients are the same (not really - we need freshly-made rice flour from still-a-bit-moist rice & fine, dry urad dal powder - in a different proportion) – and more importantly, easier to make – requiring no special skills!

When we feel like eating 'murukku', we buy from the reputed Grand Sweets / Ananda Bhavan!

I also love the yummy ‘vella cheedai’ my mom and grandma used to make – I was also aware of their nervousness every time – wondering whether they would turn out well or disintegrate or ‘burst’. So I’ve chosen not to take the risk – I make ‘neyyappam’ instead. I wonder how many of us still make 'vella cheedai'!
Some ladies make ‘vella aval’ (Krishna’s favorite– remember – Krishna’s ‘poor’ friend Kuchela brought a little bagful of aval when he comes to meet him?) ) and ‘paal payasam’ as well.

NEIYYAPPAM
For the recipe on ‘Neiyyappam’ / ‘Appam’, please refer to the recipes of ‘Karthigai’ festival.

THENGOZHAL


‘Thengozhal is one of the ‘murukku’ (chakli) varieties popular among Tam Brahms. It is made out of rice flour and urad dal powder. In earlier days, rice flour would be made fresh at home as also urad dal powder. Raw rice would be soaked in water for a couple of hours, drained and then powdered in a mixer after an hour or so and sieved. This fresh powder can be used while still damp for making thengozhal but it would be equivalent to half the quantity of dried rice flour. Urad dal powder can be made by dry roasting urad dal to a light brown and powdering in a dry grinder and sieving well so that you get fine urad dal powder. My mom would do that. And she'd always make with 2 1/2  cups (her cup was 250 ml). If she wanted to make more, she'd make a second batch of dough - she'd say that if the dough stood for long, the 'thengozhal' would absorb more oil. I have reduced the labor and use the powder I get ground at the flour mill; and I do make  2 1/2 cups alright but my cup size is 200 ml! In the modern day, we can use the dry rice flour and urad dal powder available in the stores in India and abroad. The recipe given below uses the powders available in the market. You can try by making with half the quantity mentioned in the recipe!

Makes 10-12 nos.

Preparation time - 15 minutes
Cooking time - 50 minutes

Ingredients –
Rice flour – 2 ½ cups
Urad dal powder – ¼ cup
Cumin seeds – 1 tsp
White sesame seeds – 1 tsp
Asafetida – nearly ¼ tsp
Butter – about 2 -3 tbsp
Salt to taste
Water
Oil for frying

Method –
Mix the rice flour & urad dal powder, adding salt, cumin seeds, white sesame seeds and asafetida. Add butter and mix well without any lumps.
Next add water to it and make soft dough. (Test for the consistency by putting a tablespoon of it in the chakli-maker and try pressing it down – if it requires you to put too much pressure, sprinkle a little more water and make the dough softer.)
Heat oil in a frying pan, squeeze the ‘thengozhal’ in circles in the oil and fry to a golden brown.
Drain off the oil and place them on tissue paper and store in a dry jar when cool.

Tips
I usually store my 'thengozhal powder' - it lasts for 3-4 months. You too can prepare this powder if you are in India. Dry roast 1 cup of urad dal (without oil) on medium heat till very light brown. Mix this with 4 glasses of raw rice. Get it finely ground from a flour mill – mentioning specifically that it should not get mixed with wheat flour. Sieve and store this powder and use whenever you want to make 'thengozhal'. Convenient if you are ready to take a little bit of initial trouble!

CHEEDAI


The same 'Thengozhal'powder / rice flour & urad dal powder in the same proportion as mentioned above (5:1) can be used for 'cheedai'.

Ingredients
Thengozhal powder - 1 1/2 cups
Coconut (grated) - 2 tbsps
Black pepper - 1 tsp
Cumin seeds - 1 tsp
White sesame seeds - 1 tsp
Butter - 1 - 1 1/2 tbsp
Salt to taste
Oil for frying

Method
Grind the coconut, jeera and pepper together with a little water.
Mix the flour well with butter, salt, and sesame seeds.
Add the ground coconut mixture and mix well.
Add water little by little to form a still dough.
Roll the dough gently and lightly into small marble-sized balls (making surethere are no cracks in the balls).
Heat oil in a kadhai and fry them in batches till golden brown.
Drain off onto a tissue paper.
Store in an airtight container on cooling.

Tips
Be careful when you roll out the marbles - don't roll tightly - they might'burst' while being fried!
Make sure the flour is sieved well - a coarse grain can also trigger off the 'cheedai burst'!
So ladies who have had a bitter experience with 'cheedai' are hesitant to try it out again! Remember - you have been warned!

VELLA AVAL

Ingredients
Aval (puffed rice) (thick variety) – 2 glasses
Jaggery – ¾ glass
Grated coconut – 2-3 tbsp
Cardamom powder – ½ tsp
Cashew nuts – 8
Pottu kadalai (chutney dal) – 1 tbsp
Ghee – 2 tsps

Method
Wash the aval and squeeze out the water gently and leave in a colander for 10 minutes.
Heat ¼ glass water in a kadhai, add the jaggery and stir.
Make a thick syrup after straining impurities if any.
Add the poha and mix well till dry. Remove from stove.
Heat 2 tsp of ghee in a small pan and fry the cashews till golden brown and remove.
In the same ghee, fry the pottukadalai till golden brown.
Add these fried stuff along with the ghee to the aval. Also add grated coconut and cardamom powder and mix well.
This dish is ready for ‘neivedhyam’ for Lord Krishna.

Tips
This is also a quick tea-time snack – nutritious and tasty.

This is prepared in some households.For the recipe, click on 'PAAL PAAYASAM' above for the link.

© Copyright 2011. Brinda Balasubramonian.


Friday, June 8, 2012

LEMON RICE


Lemon rice, also known as 'elumichambazha chadham' is a part of grand Palakkad feasts. It is an ideal packed lunch item many used to carry during train journeys. Nowadays many choose to fly and those who travel by train prefer to buy meals. 
This is a quicky. When I used to have leftover rice, my lunchbox would contain light yellow, tangy and tasty lemon rice which would disappear in no time with my friends yearning for more and suggesting that I bring the same everyday! If you want to tuck in some veggies, you are most welcome to do so!
At home, we call it 'nimbu chadham' (Hindamil) - that's how cosmopolitan our family is! Actually if you want to know the real reason, my family is more comfy with the term 'nimbu' than 'elumichambazham'. 

Serves 4

Ingredients
Rice – 1 glass
Turmeric powder – ½ tsp
Salt to taste
Mustard seeds – 1 tsp
Urad dal – 1 tsp
Chana dal / chutney dal – 1-2 tbsp
Asafetida – a pinch
Green chilli – 2 – chopped
Curry leaves – 10
Coriander leaves – 1-2 tbsp
Juice of 1- 11/2 big lemon
Oil – 4-5 tbsp
Cashew nut pieces / roasted peanuts – 2 tbsp


Method
Cook the rice, making sure it is not overcooked. 
Spread it on a plate and allow it to cool.
Heat 3 tbsp of oil in a nonstick pan add mustard seeds, urad dal and chutney dal followed by a pinch of asafetida. Add chopped green chilli and curry leaves and turmeric powder and stir.
Lower the stove and add the rice. Add salt and stir gently.
Turn off the heat.
After 5 minutes, add chopped coriander leaves and the juice of 1 lemon and mix well.
Garnish with roasted groundnuts or roasted cashews.
Serve hot / cold with papads / fryums.


Tips
Traditionally sesame oil is used. But if you are not used to its taste you can use your regular oil.
Basmati rice / Kolam rice / any good quality rice can be used - it should not be overcooked or squishy.
Lemon rice comes in handy for travel – pack it after it is cooled to room temperature.

© Copyright 2011. Brinda Balasubramonian.

THAYIR CHADHAM


'Thayir chadham' (curd rice) is a must in South Indian homes where  yogurt is a part of every meal. It is a great item to carry during travel - soothing and easy-on-your-stomach. It  tastes good with 'thayir molagai' / maangakary / pickle. 
The recipe given below is for 'thayir chadham' to be used after some 5-7 hours, so more milk is used than curd (the hours in between will see that the milk will get fermented). If you want to prepare this item for immediate consumption, add more curd and less milk and check its taste.


.
Ingredients
Rice – 1 cup
Curd – 1 cup
Milk – 3 cups
Sugar – ½ tsp
Salt to taste
Green chilli – 2 (chopped fine)
Ginger – 1” – chopped fine
Mustard seeds – 1 ½ tsp
Urad dal – 1 tsp
Asafetida – a pinch
Oil – 2 tsp

Method
Cook the rice. Cool it a bit.
Mash it a bit when still hot and allow it to cool.
Add the curd, salt, sugar and 1 1/2 - 2 cups of milk and mix well.
Add ginger pieces and mix well.
If you are going to use the curd rice soon, add more curd.
If it is for later use (after 4-6 hours), add more milk – it will have the right taste by then.
Heat oil in a small pan, add mustard seeds, urad dal, asafetida and green chilli pieces and add it to the curd rice.
Mix well.
Check the taste and serve with pickle / thayir molagai.


Tips
If you are packing curd rice for travel, just add 2 tbsp of curd and add enough milk to make the curd rice – it will turn sour and tasty with the passing hours.
It will also turn thick and solid in due course – you can add buttermilk / water later to loosen it to the right consistency.

© Copyright 2011. Brinda Balasubramonian.